Abstract:
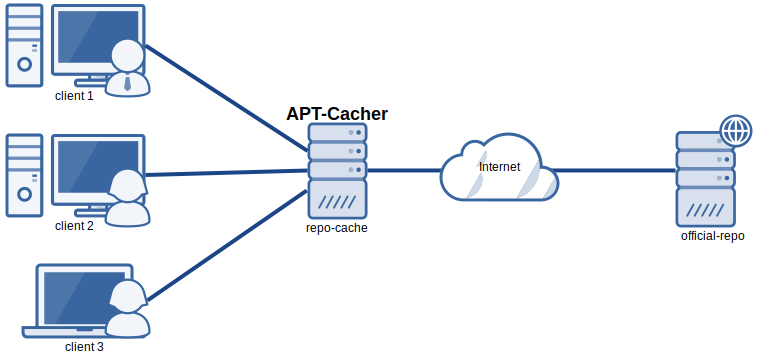
Suppose that you are on a network, a lot of Linux machines are installed, each with their own distribution version and set of packages. It happens frequently that packages are needed on the network. It’s a security risk to let old, unpatched operating systems connect to the internet. Therefore we can set up an apt-cacher server.
Server Installation:
NOTE: this caching server was implemented on a debian 9.3 Operating system.
Install apt-cacher and apache2 webserver:
$ apt-get install apt-cacher apache2
Enable apt-cacher:
Edit /etc/default/apt-cacher and change autostart to 1
Note: You may have problems doing this on a machine with apache already installed.
Restart apache:
$ sudo systemctl restart apache2
Server Configuration:
Edit /etc/apt-cacher/apt-cacher.conf and uncomment the following line:
# allowed_hosts = * Or set allowed_hosts to something appropriate.
Apt Cacher now uses IPv6 addressing so you may find you need something like: allowed_hosts=::ffff:192.168.0.1/24, for example, if you want to restrict hosts to a common home subnet.
Change the admin_email email address to something meaningful.
If you want to cache multiple distributions, uncomment the line and set distinct_namespaces value to 1:
distinct_namespaces = 1
By default apt-cacher may have problems with upgrades of ubuntu from one version to another when running do-release-upgrade -d
This can be fixed by uncommenting the line beginning with installer_files_regexp and modifying it from:
installer_files_regexp = ^(?:vmlinuz|linux|initrd\.gz|changelog|NEWS.Debian|UBUNTU_RELEASE_NAMES\.tar\.gz(?:\.gpg)?|(?:Devel|EOL)?ReleaseAnnouncement(?:\.html)?|meta-release(?:-lts)?(?:-(?:development|proposed))?)$
to:
installer_files_regexp = ^(?:vmlinuz|linux|initrd\.gz|changelog|NEWS.Debian|[a-z]+\.tar\.gz(?:\.gpg)?|UBUNTU_RELEASE_NAMES\.tar\.gz(?:\.gpg)?|(?:Devel|EOL)?ReleaseAnnouncement(?:\.html)?|meta-release(?:-lts)?(?:-(?:development|proposed))?)$
Restart apt-cacher:
$ sudo systemctl restart apt-cacher
Client Configuration:
To configure a client to utilize the apt cacher, edit below file:
$ sudo nano /etc/apt/apt.conf.d/01proxy
And populate it with the below line:
Acquire::http::Proxy "http://<IP address or hostname of the apt-cacher server>:3142";
