If you are planning to configure Windows 2012 R2 Remote Desktop Services in your environment and are planning to sign your own x509 certificates for it, then be advised that this is not as straight forward as creating a web server certificate.
You will need to create a new (duplicated from workstation) certificate template, and modify the template’s settings to incorporate the correct extensions when enrolling for a new certificate via this template.
Certificates in a Windows 2012 R2 Remote Desktop Services deployment, are typically implemented either via Powershell or the RDS deployment properties management console in Windows 2012 R2.
For simplification of this tutorial, we will be using the management console instead of Powershell.

As prerequisite for this tutorial, it is assumed that you already have an enterprise certificate authority, and remote desktop services deployement installed on your network.
Our first step will be the creation of a new certificate template, modified to enroll correct certificates for our RDS deployment.
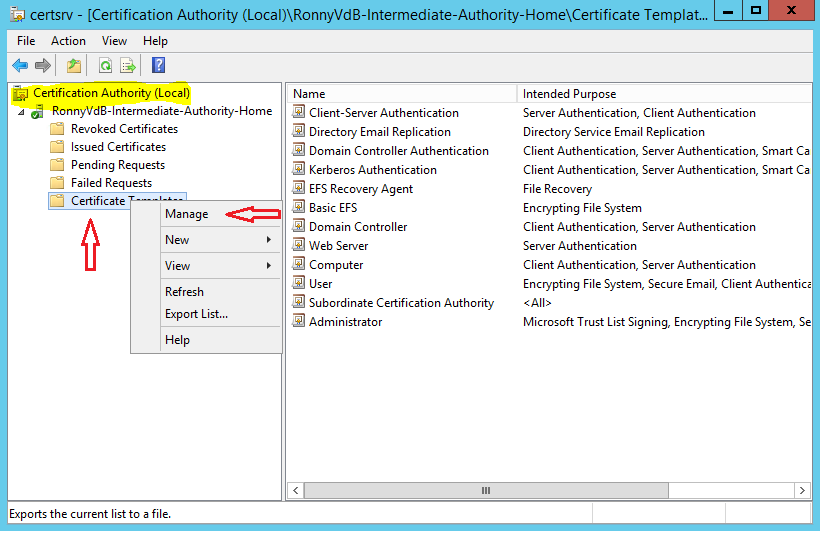
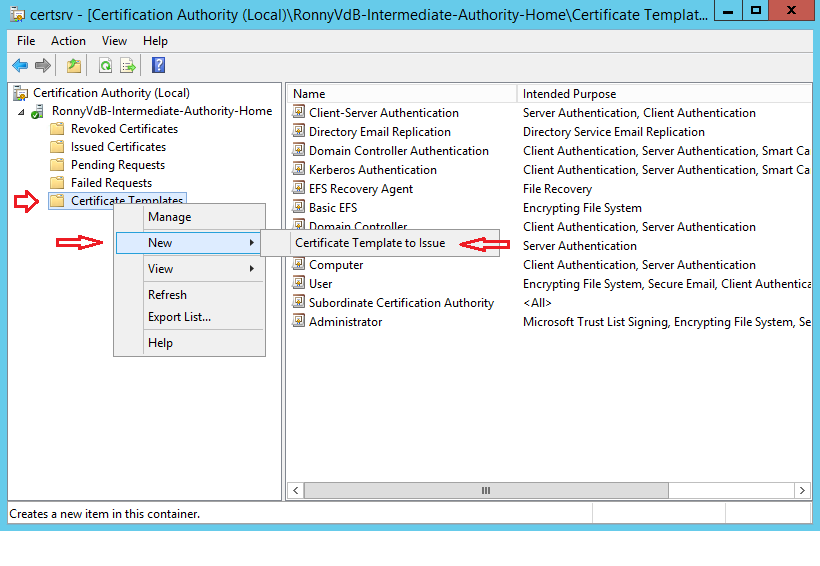
Open your Certificate Authority management snap-in from your Enterprise CA on your network, right click certificate templates and select manage.

In the certificate templates console, scroll down until you find the ‘Workstation Authentication’ template. Right click it and select Duplicate Template.

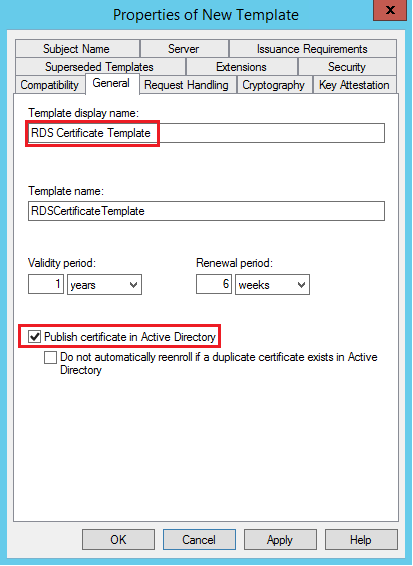
On the General tab of the new template, change the template display name to RDS Certificate Template and mark the checkbox to publish the certificate in Active Directory.

On the Request Handling tab, select ‘allow private key to be exported’.

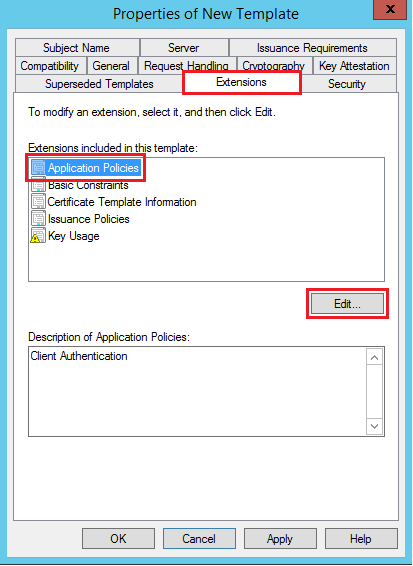
On the Extensions tab, select Application Policies and select Edit.

Add Server Authentication to the list.

On the Subject Name tab, select ‘Supply in the request’.

Accept the resulting message.

Close the new template now by selecting ok, and close your Certificates Templates Console.
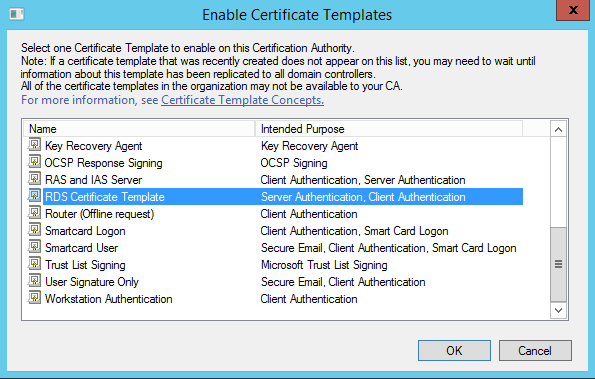
Go back to the certificate authority management snap-in and right click Certificate Templates, New, Certificate Template to issue:

Select the new RDS Certificate Template and click ok.

The new certificate template is now added to your Enterprise Certification Authority, and can now be used to enroll correct certificates for usage with Remote Desktop Services.
For proof of concept, we will enroll a certificate using this template on our Remote Desktop Broker Server.
Log in to your Remote Desktop Broker server, in my case, rdbroker01.
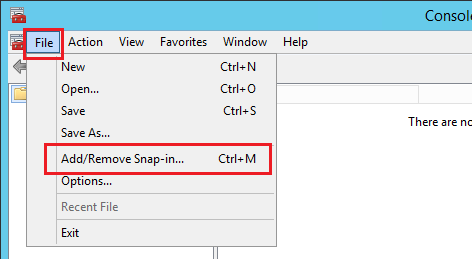
Open a management console by right clicking start, then run, type mmc and press enter.
Click File – Add/Remove Snap-in…

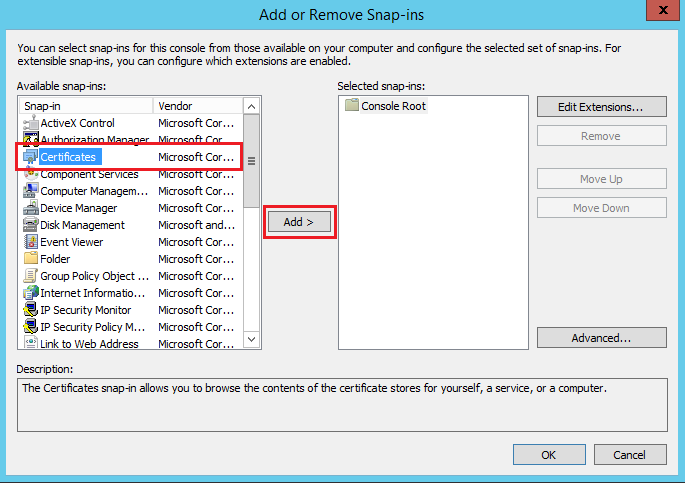
Select the Certificates snap-in and click add.

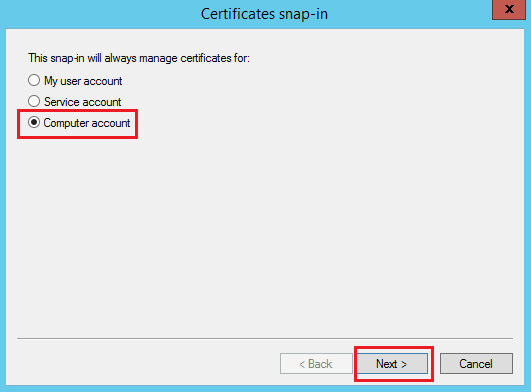
Select computer account and click next.

Select local computer and click finish.

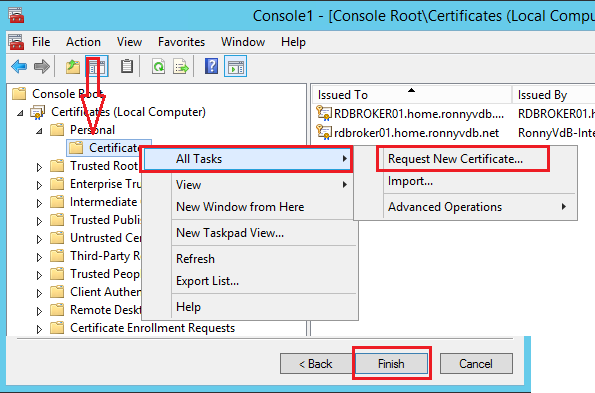
Now we have the Certificates Store of the local computer open, we will be requesting a new certificate from within this console to our enterprise CA.
Under Certificates, Personal, right click the certificates folder and select all tasks, request new certificate.

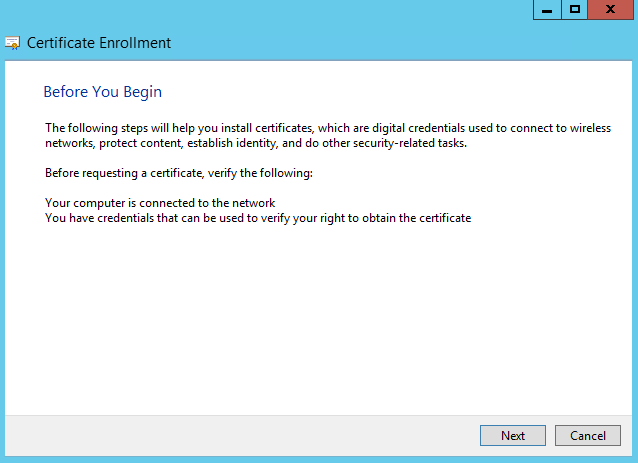
Click next on the certificate enrollment window.

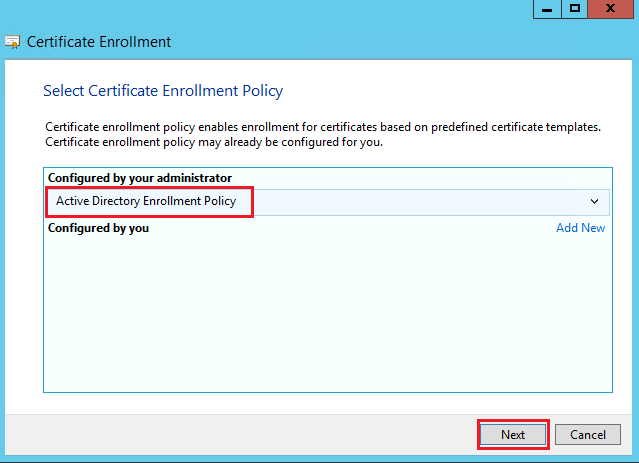
Make sure Active Directory Enrollment Policy is highlighted, and click next.

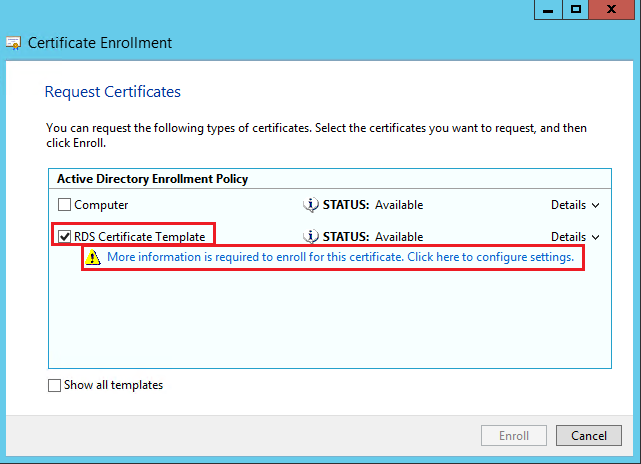
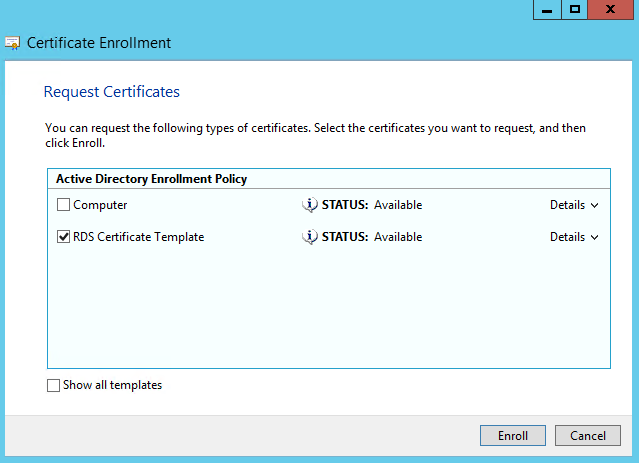
Select RDS Certificate Template, and click the link to configure additional information for enrollment.

On the certificate properties window, add a common name for the certificate, this may be your FQDN of your RDS broker server, subsequently, add alternative dns names for other roles that u might be hosting on the same server like your RDS web access, or if you are planning to use this certificate also on the other servers in your deployment, add the FQDN’s of the other servers as DNS entries.

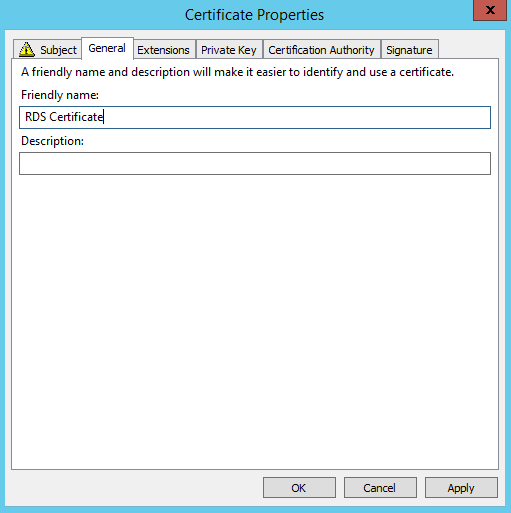
On the General tab, fill in a descriptive name for the certificate that you are enrolling, after this, select ok to close the certificate properties window.

Now click the Enroll button to request your certificate to the Enterprise CA.

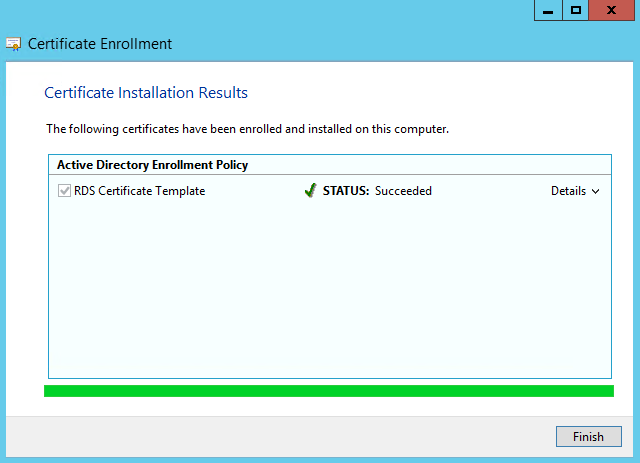
The Certificate Enrollment process should complete successfully, click finish to close the enrollment window.

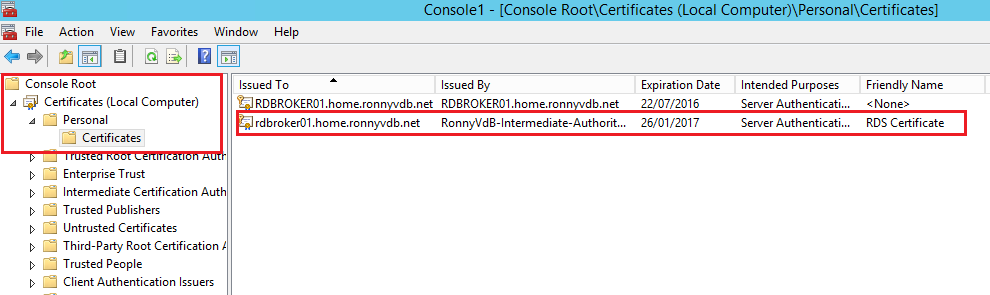
In our Certificate Management Snap-in we can verify that our new certificate is enrolled and available to us. If it is not displayed at first, then press F5 to refresh and make it visible.

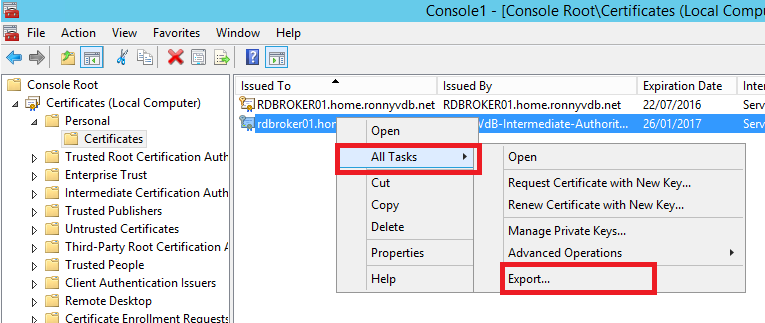
We now need to export the certificate and the private key to import it again via our RDS management console.
Right click the certificate, select all tasks and click export.

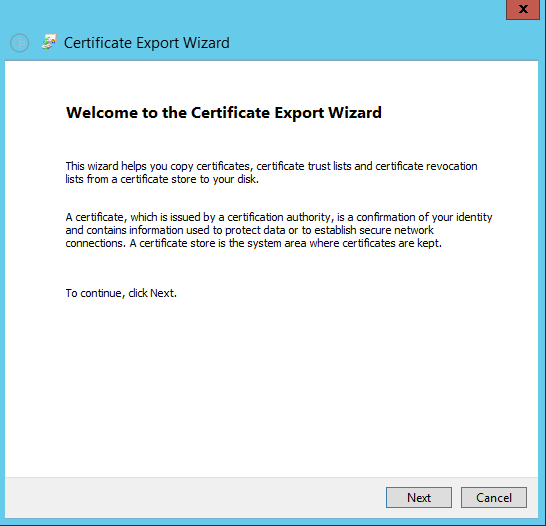
Click next on the certificate export wizard.

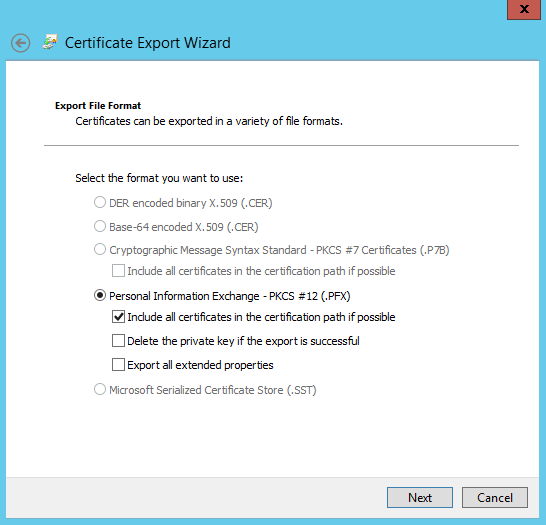
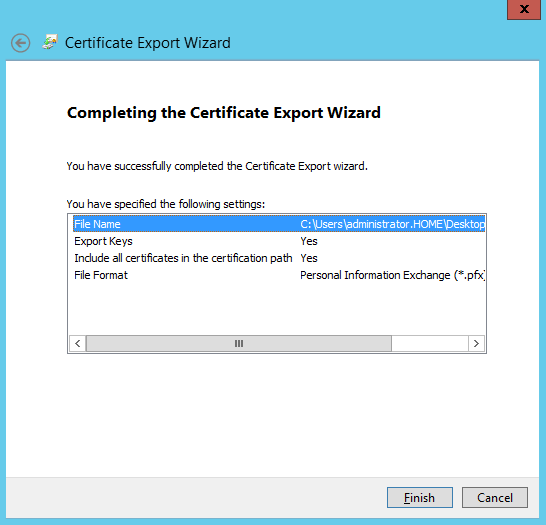
Select yes, export the private key and click next.

Accept the default settings in this window and click next.

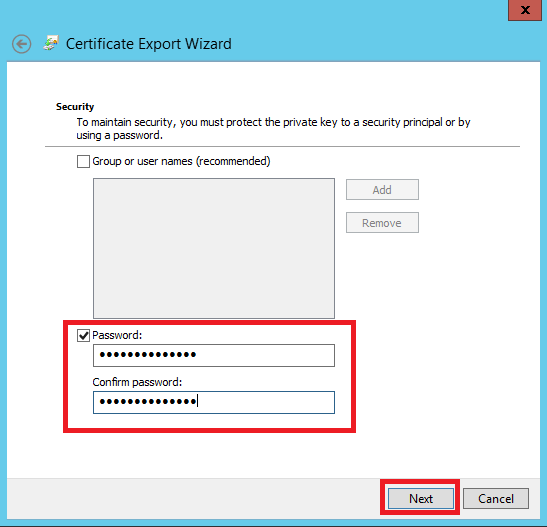
Set a password to protect your private key.

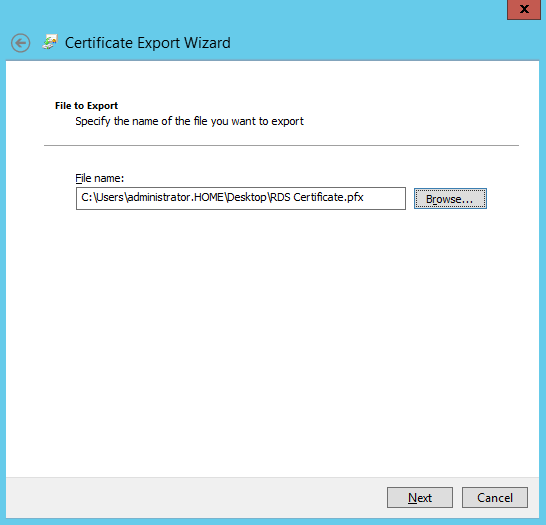
Set the filename to where you want to export the certificate.

Click finish to complete the certificate export.

Now that we have the exported certificate ready, we can finish the certificate installation on our Remote Desktop Management console.
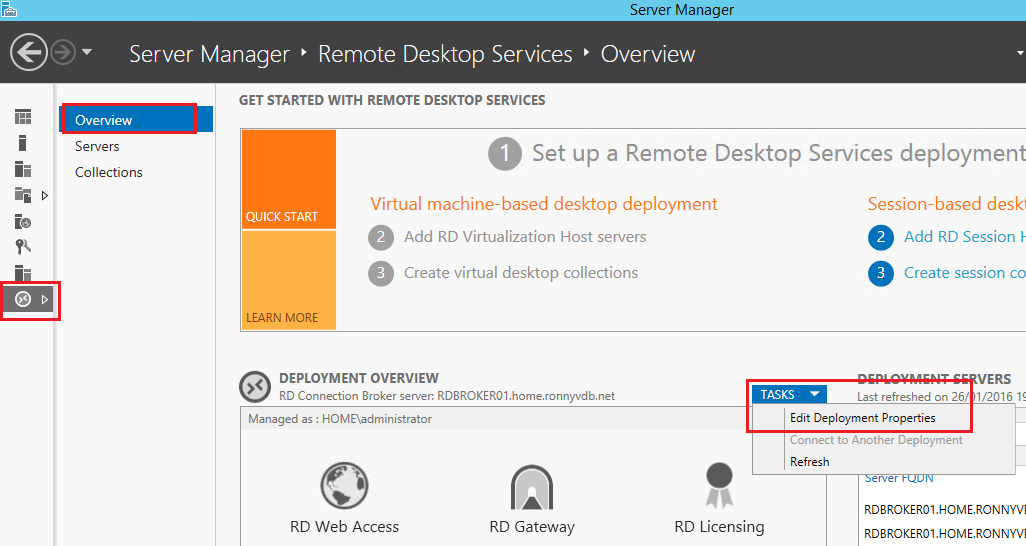
Open Server Manager, and open Remote Desktop Services in the left pane, then click tasks, and edit deployment properties.

Go to certificates, highlight the role for which u want to deploy your certificate, and click select existing certificate.

Select, choose a different certificate, browse for your certificate, enter your certificate password, and select to allow the certificate to be added to the trusted root certification authorities store. After that confirm with ok.

Click apply to apply the certificate. After this action, the status will show OK and the level will be Trusted.

Just a hint
“On the Subject Name tab, select ‘Supply in the request’.”
Will prevent the ability to deploy this template as template for a session host through gpo
LikeLike