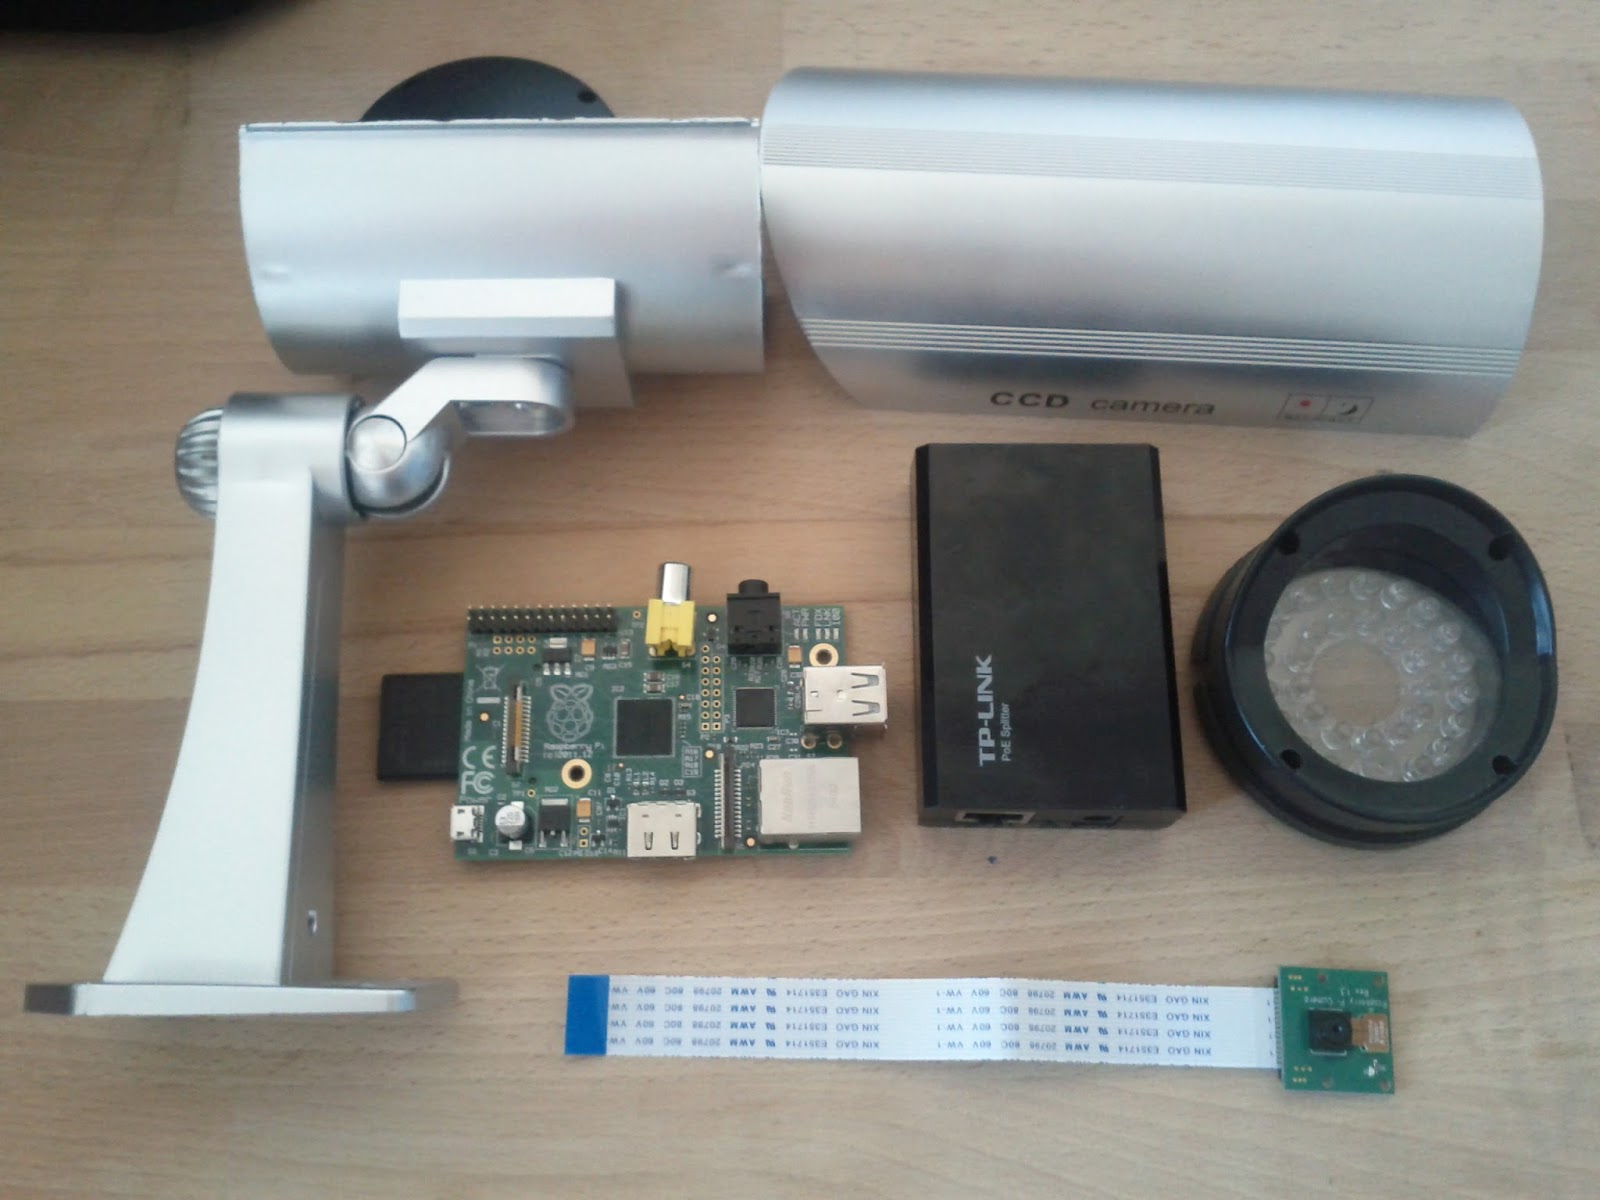

At the time of writing I’m developing a Bootstrap/Web interface for the Raspberry Pi camera module, to transform a Raspberry Pi into an easily configurable IP Camera.
As we all come to know it, the GPU module which comes with the Raspberry Pi supports several hardware assisted encoding formats.
Two of the more popular format’s include H264, – and MJPEG encoding, my little project consists only of these two encoding formats.
In the IP camera which i’m developing I wanted to make both standards easily available for external connection like video recording software/hardware, this while preserving the capability to display the video feed of the camera on the web interface itself.
To display an MJPEG feed on a web page, this is very easy, as you can just insert an <img> tag in your html page which links up to your MJPEG stream and you’re off, upon loading your web page this feed will play.
Example:
<img src=”http://raspberryip/?action=stream” alt=””/>
Displaying the raw H264 feed from the Raspberry IP camera on a web page was a lot more difficult.
We need to make use of the HTML5 video tag to display H264 encoded video on a web page.
The H264 encoded data stream which comes off the Raspberry Pi’s GPU is a raw bytestream and cannot be delivered by direct means to the web page, we need to encapsulate the stream in MP4 container format to subsequently deliver it over HTTP to the web browser’s video tag for playing.
If we split this whole task in bite size chunks we can distract a few distinct pieces:
- Getting the raw H264 data feed from the Raspberry Pi’s GPU.
- Wrap the raw H264 data feed in MP4 container chunk format.
- Transfer these MP4 container chunks to the browser on demand.
1. Getting the raw H264 data stream from the GPU is well documented and easy.
You can use the raspivid tool (which comes with the Raspberry Pi) to dump out the raw H264 data stream. To dump this stream to standard output you can use below command:
$ raspivid -w 1920 -h 1080 -fps 30 -pf high -n -t 0 -o -
2. Getting this raw output into MP4 container format was a bit more difficult, and involves the use of gstreamer. Gstreamer is like a swiss army knife if you want to transcode media data, and is highly modular, it supports a lot of media data types.
Raspbian already contains a version of gstreamer in it’s repository, and is installable with aptitude.
To install gstreamer:
$ sudo apt-get -y install gstreamer1.0
And afterwards use gstreamer to transcode our stream:
$ gst-launch-1.0 -e -q fdsrc fd=0 ! video/x-h264,width=1920,height=1080,framerate=30/1,stream-format=byte-stream ! h264parse ! mp4mux streamable=true fragment-duration=10 presentation-time=true ! filesink location=/dev/stdout'
3. Transferring our containerized MP4 data stream to the browser involves on demand transfer over http to the video element in our browser. For this we can use a small python script, which runs a simple web server to transfer our transcoded data to the browser. Upon get request from our browser our MP4 will be send to the browser, and the browser will play the video data through the HTML5 video tag.
import subprocess # for piping
from BaseHTTPServer import HTTPServer, BaseHTTPRequestHandler

class RequestHandler(BaseHTTPRequestHandler):
    def _writeheaders(self):
        self.send_response(200) # 200 OK http response
        self.send_header('Content-type', 'video/mp4')
        self.end_headers()

    def do_HEAD(self):
        self._writeheaders()

    def do_GET(self):
        self._writeheaders()

        DataChunkSize = 10000

        command = '(echo "--video boundary--"; raspivid -w 1920 -h 1080 -fps 30 -pf high -n -t 0 -o -;) | gst-launch-1.0 -e -q fdsrc fd=0 ! video/x-h264,width=1920,height=1080,framerate=30/1,stream-format=byte-stream ! h264parse ! mp4mux streamable=true fragment-duration=10 presentation-time=true ! filesink location=/dev/stdout'
        print("running command: %s" % (command, ))
        p = subprocess.Popen(command, stdout=subprocess.PIPE, bufsize=-1, shell=True)

        print("starting polling loop.")
        while(p.poll() is None):
            print "looping... "
            stdoutdata = p.stdout.read(DataChunkSize)
            self.wfile.write(stdoutdata)

        print("Done Looping")

        print("dumping last data, if any")
        stdoutdata = p.stdout.read(DataChunkSize)
        self.wfile.write(stdoutdata)

if __name__ == '__main__':
    serveraddr = ('', 8765) # connect to port 8765
    srvr = HTTPServer(serveraddr, RequestHandler)
    srvr.serve_forever()
Let’s say we save this script to a file called httpserver, then we need to run this file with python:
$ python httpserver
The only thing that remains now is to build a simple web page with the HTML5 video element which will connect to this web server for the video feed.
$ <!doctype html>
<html>
<head>
<meta charset="utf-8">
<title>HTML5 Video Tag Test</title>
</head>

<video width="1920" height="1080" controls>
  <source src="http://192.168.20.147:8765" type="video/mp4">

Your browser does not support the video tag.
</video>

<body>
</body>
</html>
