Welcome back for part 2 of our tutorial.
In this part we will be configuring our Enterprise Subordinate Certificate Authority for certificate issuance and CRL distribution.
Installing the Enterprise Subordinate CA:
To complete this installation we will be performing below steps:
- Prepare the CAPolicy.inf for the Enterprise Subordinate CA
- Install the Enterprise Subordinate CA
- Configure the Enterprise Subordinate CA Authority Information Access and Certificate Distribution Point settings
Open Windows PowerShell

Type: notepad c:\Windows\CAPolicy.inf and press ENTER.
When prompted to create a new file, click Yes.Enter the following as the contents of the file:
[Version] Signature="$Windows NT$"
[PolicyStatementExtension]
Policies=InternalPolicy

[InternalPolicy]
OID= 1.2.3.4.1455.67.89.5
Notice="Legal Policy Statement"
URL=http://dc01.mynetwork.net/pki/cps.txt

[Certsrv_Server]
RenewalKeyLength=2048
RenewalValidityPeriod=Years
RenewalValidityPeriodUnits=5
LoadDefaultTemplates=0 AlternateSignatureAlgorithm=1
Note:
Windows XP and Windows Server 2003 certificate clients do not support the Alternate Signature Algorithm. If you want these clients to be able to enroll for certificates, do not add the line AlternateSignatureAlgorithm=1 to the CAPolicy.inf.
Save the file as C:\Windows\CAPolicy.inf, make sure to save it in the ANSI encoding format.


To install the Enterprise Subordinate CA Role:
1. In Server Manager, click Manage, and then click Add Roles and Features.

2. On the Before you begin screen, click Next.

3. On the Select installation type screen, ensure the default selection of Role-based or feature-based installation is selected. Click Next.

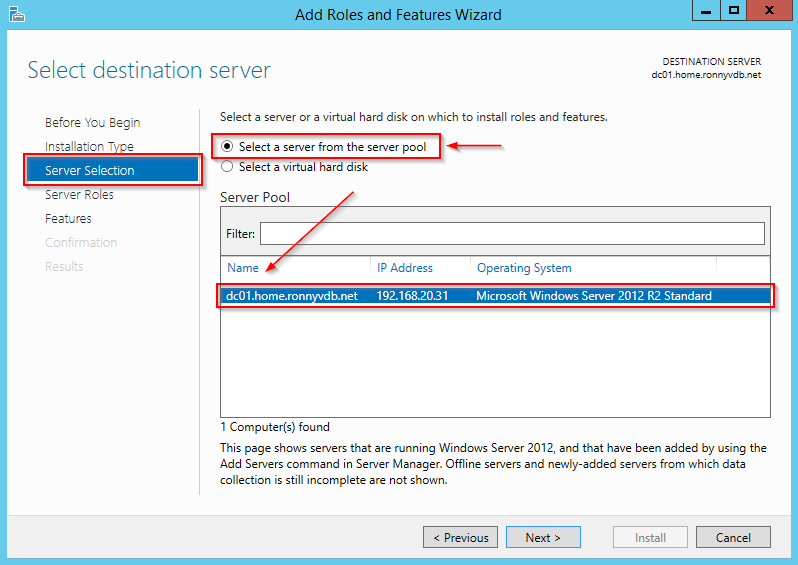
4. On the Select destination server screen, ensure that DC01 is selected and then click Next.
5. On the Select server roles screen, select the Active Directory Certificate Services role.

6. When prompted to install Remote Server Administration Tools click Add Features. Click Next.

7. On the Select features screen, click Next.

8. On the Active Directory Certificate Services screen, click Next.

9. On the Select role services screen, the Certification Authority role is selected by default. Click Next.

10. On the Confirm installation selections screen, verify the information and then click Install.

11. Wait for the installation to complete. The installation progress screen is displayed while the binary files for the CA are installed.

The necessary files have now been installed for our Certificate Services Role.
Configuring Active Directory Certificates Services on the destination server.
1. When the binary file installation is complete, click the Configure Active Directory Certificate Services on the destination server link.

2 On the Credentials screen, you should see that the DOMAIN\Administrator is displayed in the Credentialsbox. Click Next.

3. On the Role Services screen, select Certification Authority. This is the only available selection when only the binary files for the certification authority role are installed on the server. Click Next.

4. On the Setup Type screen, ensure that Enterprise CA is selected and then click Next.

5. On the CA Type screen, select Subordinate CA to install an Enterprise Subordinate CA. Click Next.

6. On the Private Key screen, leave the default selection to Create a new private key selected. Click Next.

7. On the Cryptography for CA screen, ensure that the cryptographic provider is RSA#Microsoft Software Key Storage Provider, the key length is set to 2048 and the hash algorithm is set to SHA1 then click Next.
Do not select the Allow administrator interaction when the private key is accessed by the CAcheckbox. This setting is typically used with Hardware Security Modules (HSMs) and similar key protection devices prompt for additional information when the private key is accessed.

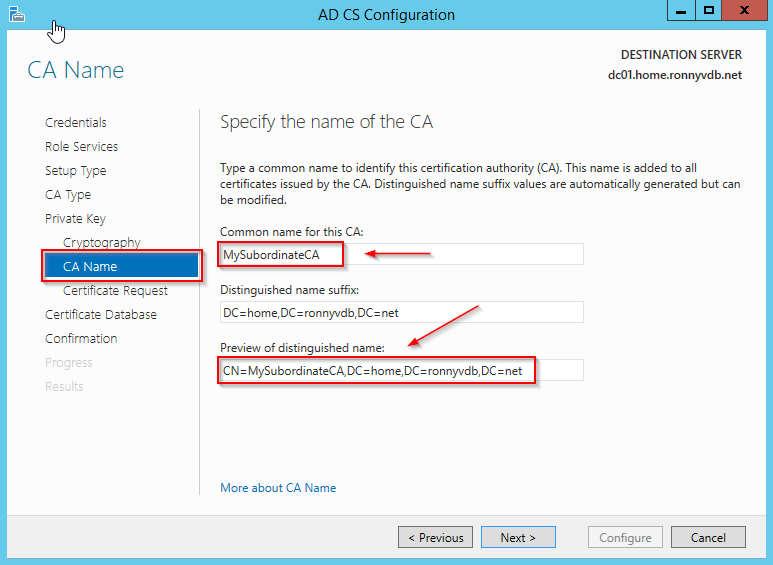
8. On the CA Name screen, in the Common name for this CA text box, type MySubordinateCA and then clickNext.
Note that your distinguished name should be automatically expanded to cover your domain name as well.
9. On the Certificate Request screen, notice that Save a certificate request to file on the target machine is selected. This is the correct option because we are using an offline parent CA (the root CA) in this configuration. Leave the default and click Next.

10. On the CA Database screen, leave the default locations for the database and database log files. Click Next.

11. On the Confirmation screen, click Configure.

12. On the Results screen, you see that you must take the certificate request to the RootCA in order to complete the configuration. Click Close

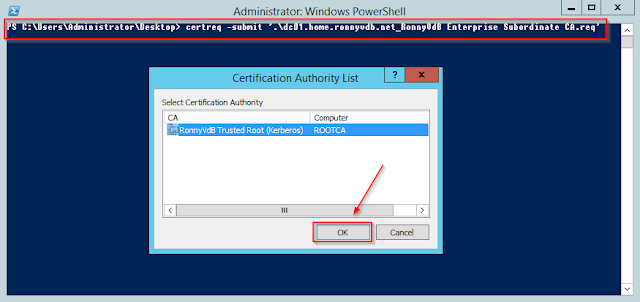
13. Once that you have your certificate request file copied onto your Root Certificate Authority, submit it to your CA.
14. On ROOTCA, you must approve the request. You can do this using Server Manager or by using certutil from the command line.
In Server Manager, click Tools and then click Certification Authority.

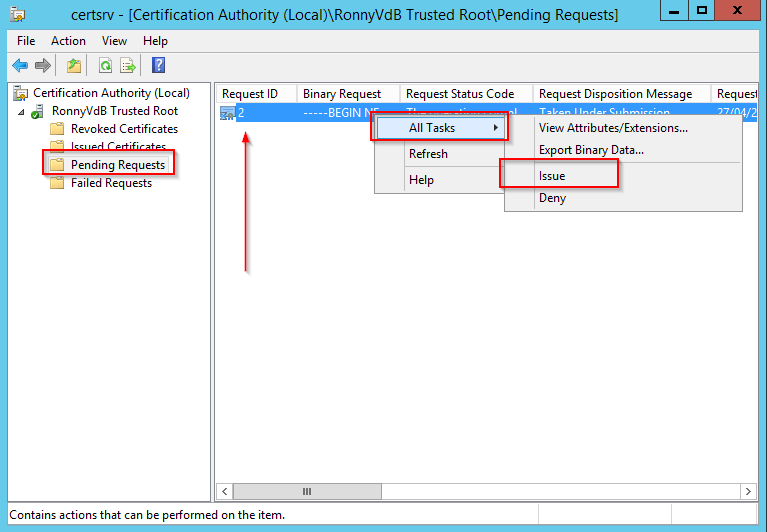
To use Server Manager, click Tools, and then click Certification Authority. Expand the RootCA object and then click Pending Requests.
Right-click the Request ID that corresponds with the one you saw when you submitted the request in the previous step. Click All Tasks and then click Issue.
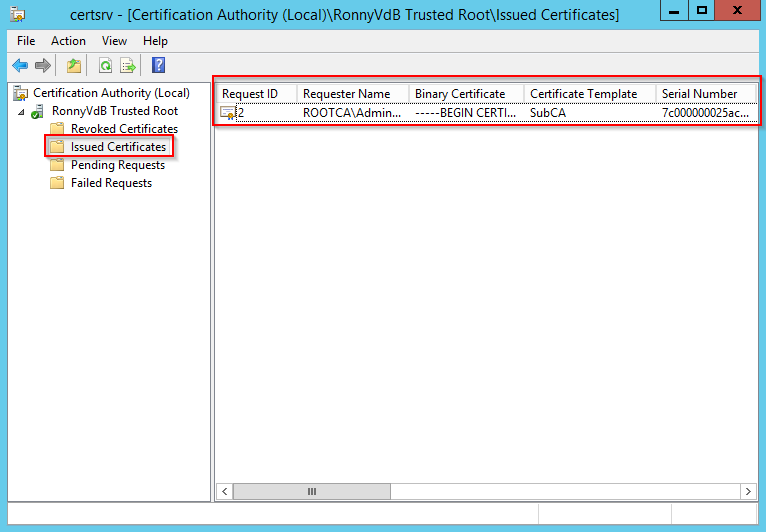
Click Issued Certificates and see the issued certificate in the Details pane.
From the command prompt on ROOTCA, retrieve the issued certificate by running the command
certreq –retrieve <RequestId> <drive>:\MyApprovedCertificate.crt.

Save your retrieved certificate back onto your removable media and copy it over to your Enterprise Subordinate CA.
On DC01, copy all the files from your removable media into the C:\pki folder, there should be three files there:
1. The root certificate from your ROOTCA
2. The certificate revocation list from your ROOTCA
3. Your approved certificate for your Enterprise Subordinate CA
Now install your approved Enterprise Subordinate Certificate onto your Certificate Authority with the below powershell commands:
certutil –installcert a:\APP1.corp.contoso.com_corp-APP1-CA.crt
start-service certsvc
Note:
At this point you can shut down your ROOTCA, and protect it from access by anyone, until you need to regenerate your Enterprise Subordinate CA (in 10 years);
Configuring Certificate Revocation Lists and Authority Information Access
In a powershell session, we will configure the the CDP and AIA settings for our Enterprise Subordinate CA.
Open a powershell window and enter the following commands:
$crllist = Get-CACrlDistributionPoint; foreach ($crl in $crllist) {Remove-CACrlDistributionPoint $crl.uri -Force};
 Add-CACRLDistributionPoint -Uri C:\Windows\System32\CertSrv\CertEnroll\%3%8%9.crl -PublishToServer -PublishDeltaToServer -Force
 Add-CACRLDistributionPoint -Uri http://dc01.mynetwork.net/pki/%3%8%9.crl -AddToCertificateCDP -Force
 Add-CACRLDistributionPoint -Uri file://\dc01.mynetwork.net\pki\%3%8%9.crl -PublishToServer -PublishDeltaToServer -Force
 $aialist = Get-CAAuthorityInformationAccess; foreach ($aia in $aialist) {Remove-CAAuthorityInformationAccess $aia.uri -Force};
 Add-CAAuthorityInformationAccess -AddToCertificateAia http://dc01.mynetwork.net/pki/%1_%3%4.crt -Force
 Certutil -setreg CA\CRLPeriodUnits 2
 Certutil -setreg CA\CRLPeriod “Weeks”
 Certutil -setreg CA\CRLDeltaPeriodUnits 1
 Certutil -setreg CA\CRLDeltaPeriod “Days”
 Certutil -setreg CA\CRLOverlapPeriodUnits 24
 Certutil -setreg CA\CRLOverlapPeriod “Hours”
 Certutil -setreg CA\ValidityPeriodUnits 5
 Certutil -setreg CA\ValidityPeriod “Years”
 restart-service certsvc
 certutil -crl
Note:
A configuration item that is typically performed on production CAs that is not part of this lab is to enable Audit Object Access (http://technet.microsoft.com/library/cc776774.aspx) and then to enable all auditing events by running the following command: certutil -setreg CA\AuditFilter 127. After doing so, ensure that you regularly archive the Security Event Log and follow the Auditing Security Events Best Practices(http://technet.microsoft.com/library/cc778162.aspx).
Configure computer certificate autoenrollment
To enable computer certificate auto enrollment, you will need to run through 2 procedures:
- Enable certificate autoenrollment through Group Policy
- Configure a client and server authentication certificate template for autoenrollment
To enable certificate autoenrollment through Group Policy
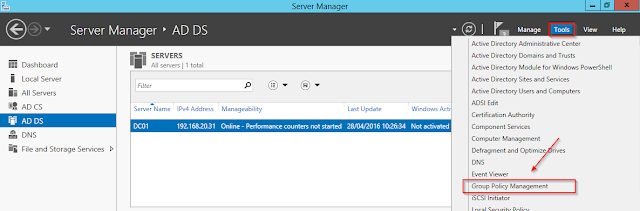
On DC1, sign in as Administrator. In Server Manager, click Tools, and then click Group Policy Management.
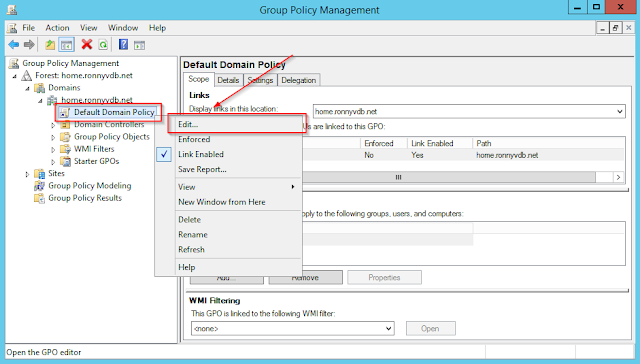
In your group policy management console, edit your default domain policy
In your default domain policy, go over to Computer Configuration – Policies – Windows Settings – Security Settings – Public Key Policies – and open – Certificate Services Client – Certificate Enrollment Policy
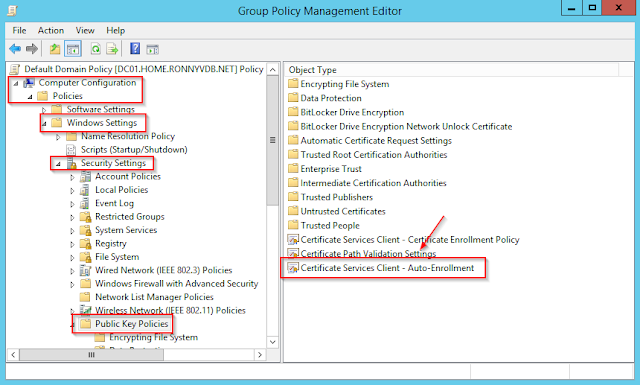
Select Renew expired certificates, update pending certificates, and remove revoked certificates andUpdate certificates that use certificate templates. Click OK.

The auto enrollment will not work unless we configure a client server authentication certificate template for autoenrollment
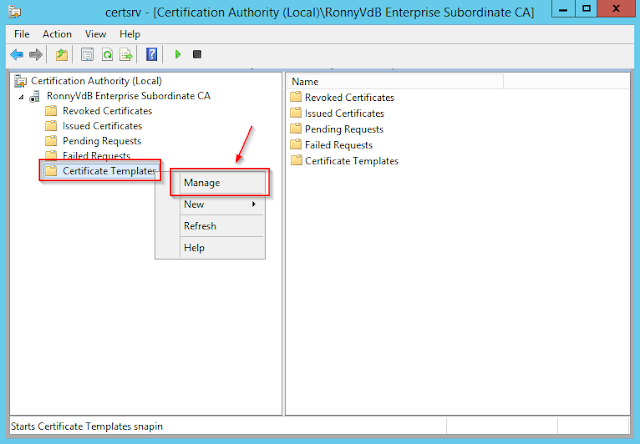
On DC01, in the Certification Authority console pane, right click Certificate Templates and select Manage.
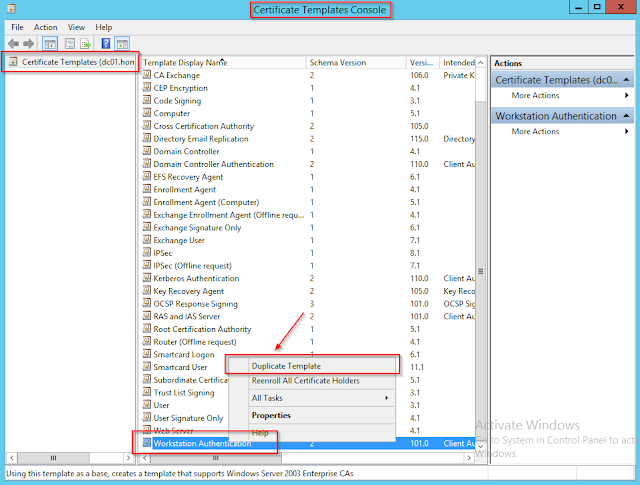
In the details pane, right-click Workstation Authentication and then click Duplicate Template.
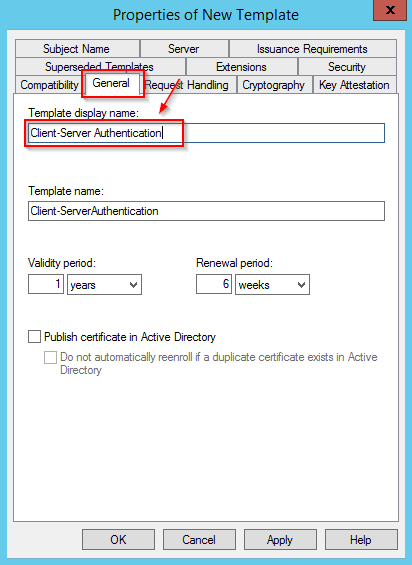
Click the General tab, in Template display name, type Client-Server Authentication.
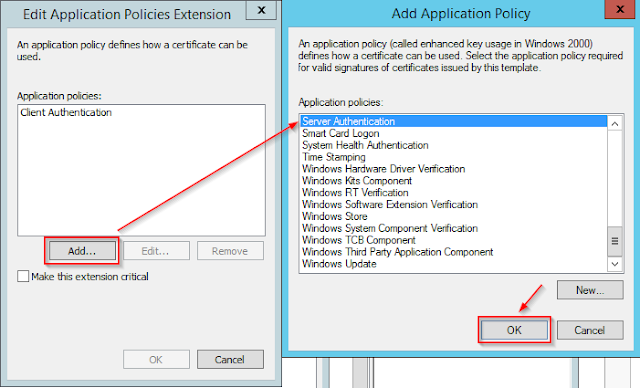
Click the Extensions tab, ensure Application Policies is selected, and then click Edit.
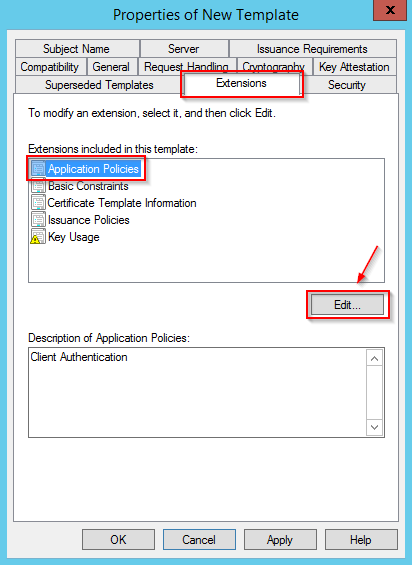
Click Add then click Server Authentication. Click OK twice.
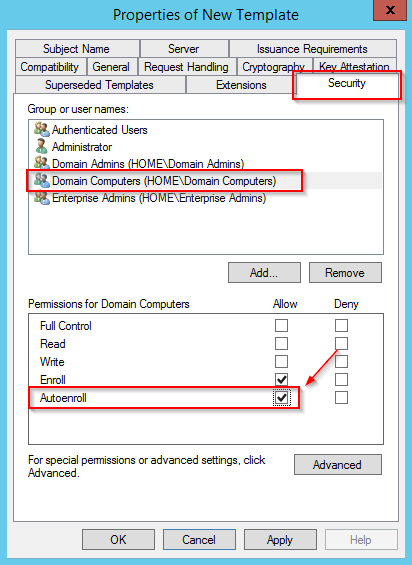
On the Properties of New Template dialog, click the Security tab.
In Group or user names, click Domain Computers (CORP\Domain Computers).
In the Autoenroll row, select the Allow checkbox. This will cause all domain computers to automatically enroll for certificates using this template. Now click ok to close the properties of the new template.
Note:
You would typically not assign a template both the Client Authentication and the Server Authentication enhanced key usage (EKU). Also, Server Authentication EKU are typically not configured for autoenrollment. This is done in this lab only for convenience and compatibility with other labs.
Note:
The computers also need Read permission for the template in order to enroll. However, this permission is already granted to the Authenticated Users group. All computer accounts in the domain are members of Authenticated Users, so they already have the permission to Read the template.
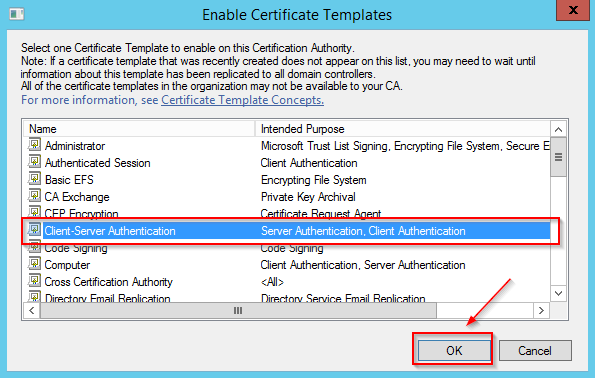
Before this template will do it’s work, you need to issue it.
Right-click Certificate Templates, click New, click Certificate Template to Issue.

In the Enable Certificate Templates dialog box, click Client-Server Authentication and then click OK. Close the Certification Authority console.