This article outlines one possible way to set-up a remote desktop services farm in Windows 2012 R2.
Before Windows 2012 came on the scene, setting up remote desktop services involved a lot of manual labour, installing several components managed in a heap of management snap-ins.
When designing Windows 2012, Microsoft has put a lot of effort in centralising all the configuration panels for a Remote Desktop Services deployment in one central management console, they even have implemented deployment wizards to make the whole installation process easy to handle.
A Microsoft Windows 2012/R2 Remote Desktop Services deployment is divided into several roles which can be installed on separate servers. In a full deployment we can have the following roles:
Remote Desktop Connection Broker:
Connects or reconnects a client device to RemoteApp programs, session-based desktops and virtual desktops.
Remote Desktop WebAccess:
Enables users to connect to resources provided by session collections and virtual desktop collections by using the Start menu or a web browser.
Remote Desktop Session Host:
A server running the Remote Desktop Protocol Server. This allows the server to run RemoteApp and session-based desktops.
Remote Desktop Gateway:
Enables authorized users to connect to virtual desktops, RemoteApp programs, and session-based desktops on the corporate network or over the Internet.
In below procedures we’ll be performing a lab tutorial to install a Windows 2012 Remote Desktop Services Farm consisting of the following servers and roles:
RDSBROKER01:
Remote Desktop Services connection broker and web resource server
RDSBROKER02:
Remote Desktop Services connection broker (provided for high availability)
RDS01:
Remote Desktop Services session host server
RDS02:
Remote Desktop Services session host server
RDSGWY01:
Remote Desktop Services gateway server
Log in to your first server (RDSBROKER01) and open the Server Manager console.
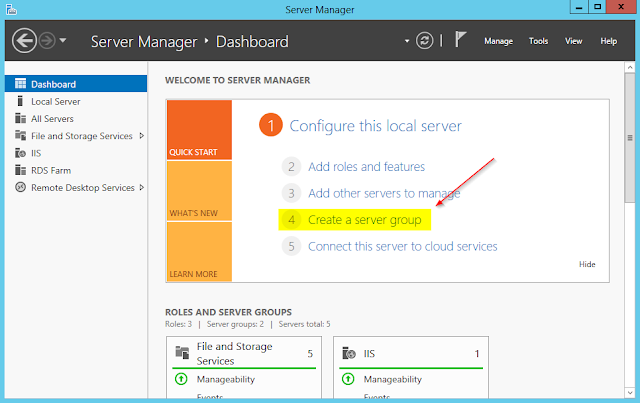
For organisational purposes we will create a server group to hold all of our Remote Desktop Services servers, this is not required for the deployment though.
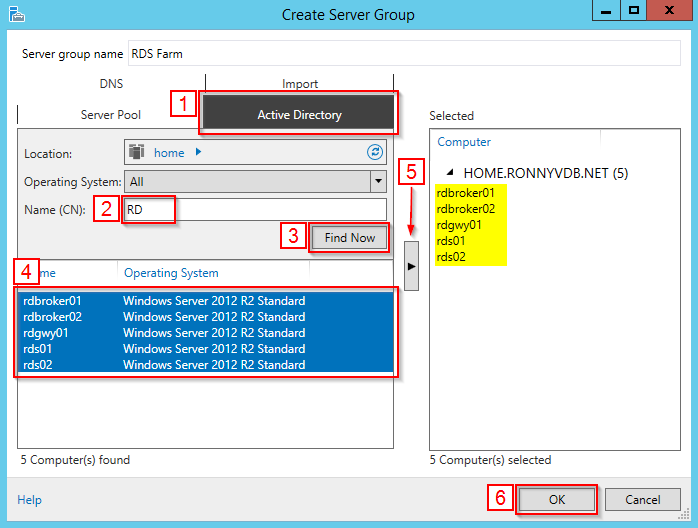
In the Server Manager, click on ‘Create a Server Group’.
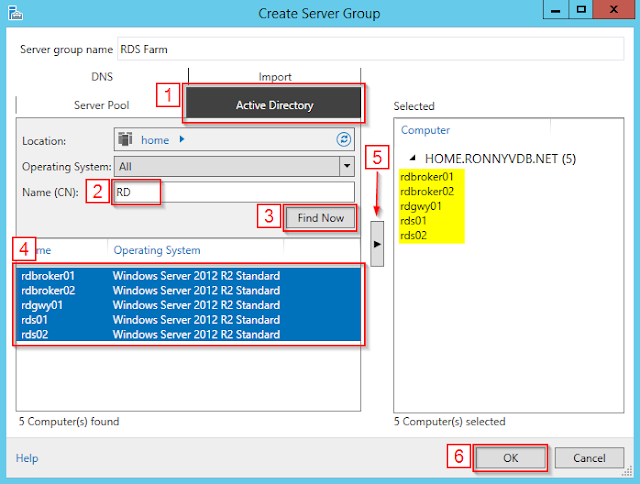
1. Select the Active Directory tab.
2. Enter ‘RD’ as search string in the Name box.
3. Click on ‘Find Now’.
4. Ctrl select all servers that you want to add to this group.
5. Click the arrow to add them to the group.
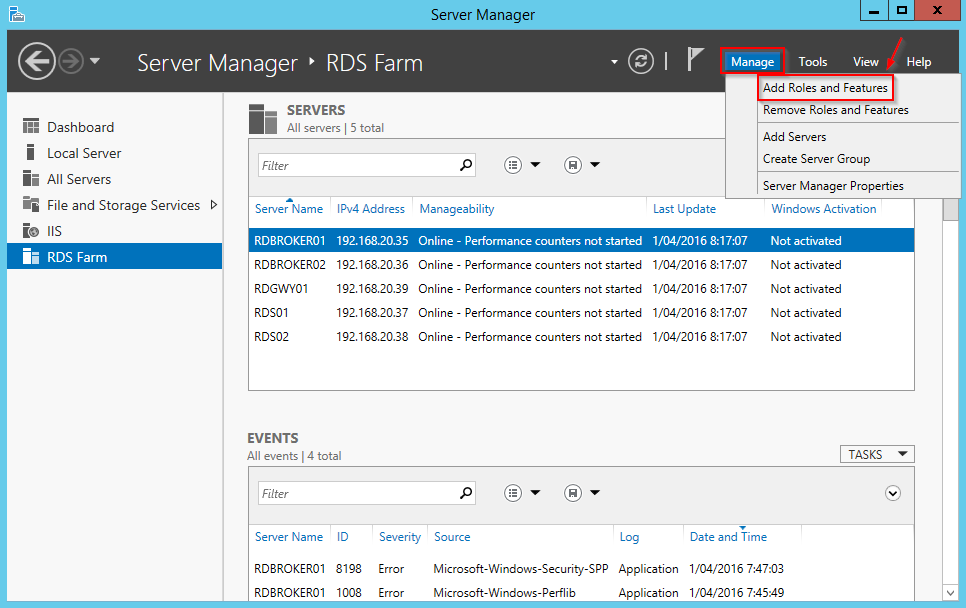
In the Server Manager a new node will appear with the group name that we created, which holds the servers that we have added to it.
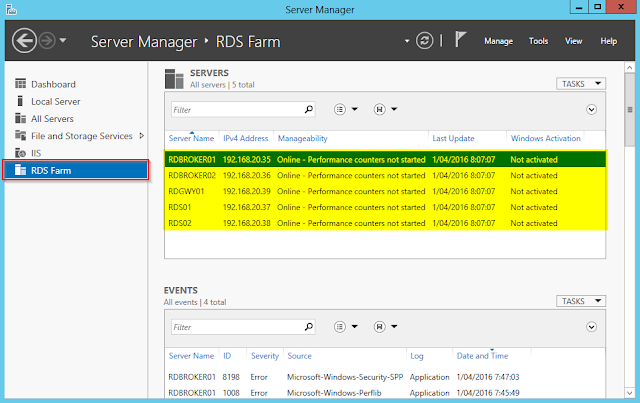
We can now start deploying our Remote Desktop Services roles to these servers.
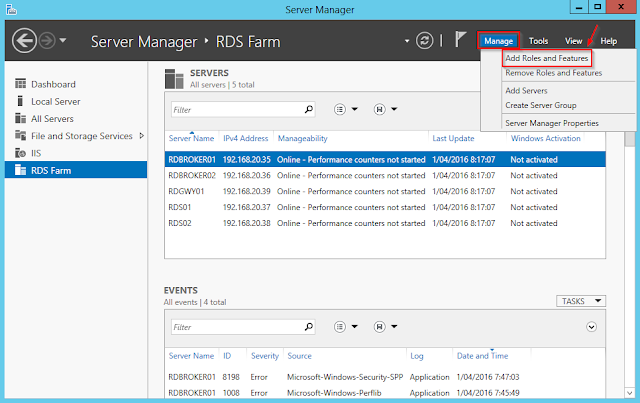
Click on ‘Manage’, then click on ‘Add Roles and Features’.
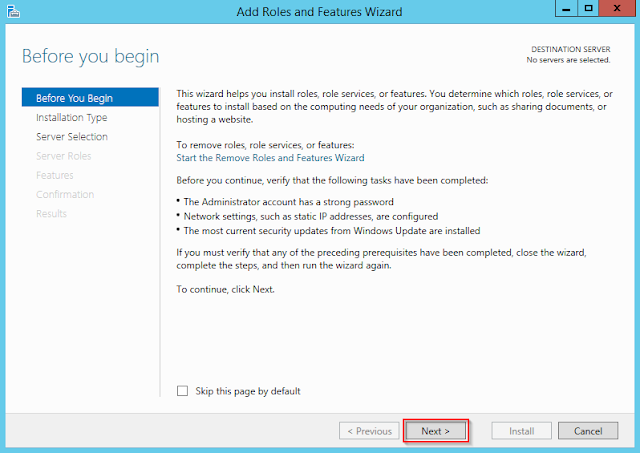
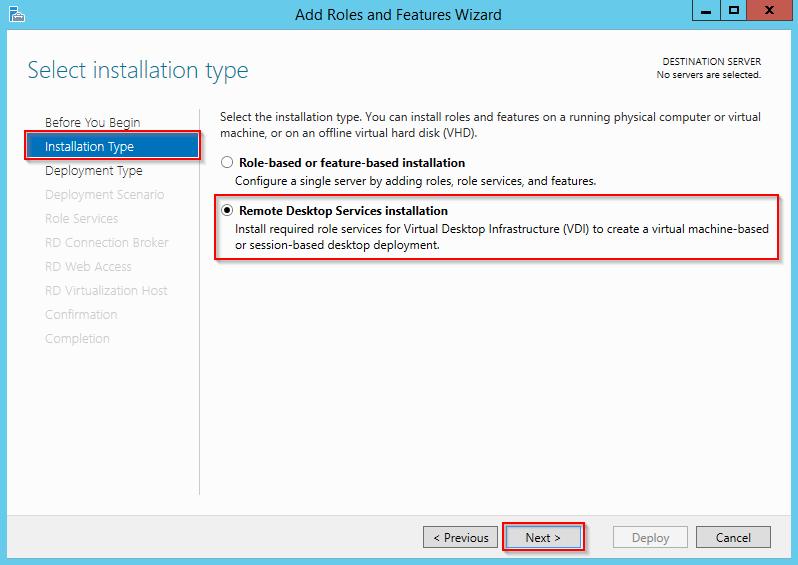
Select ‘Next’ on the ‘Before You Begin’ screen.
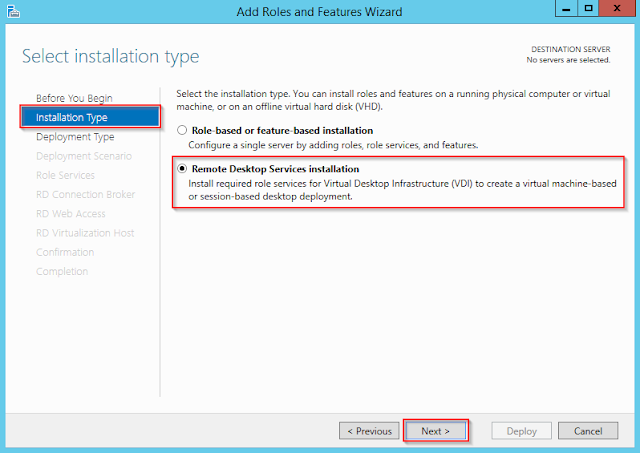
On the ‘Installation Type screen, select ‘Remote Desktop Services Installation’, then click ‘Next’.
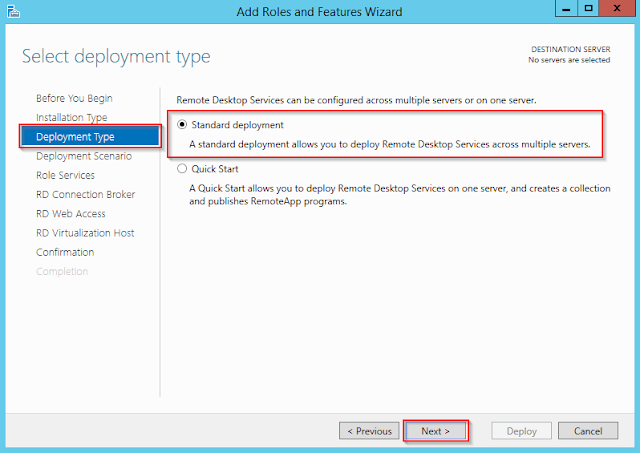
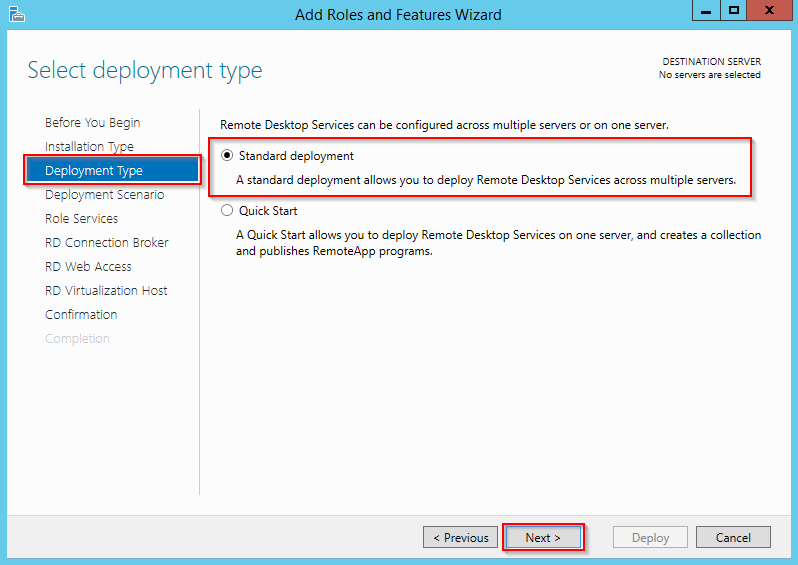
Select ‘Standard deployment’ and click next. (quick start deployment is only for proof of concept environments and should never be used out of lab environments)
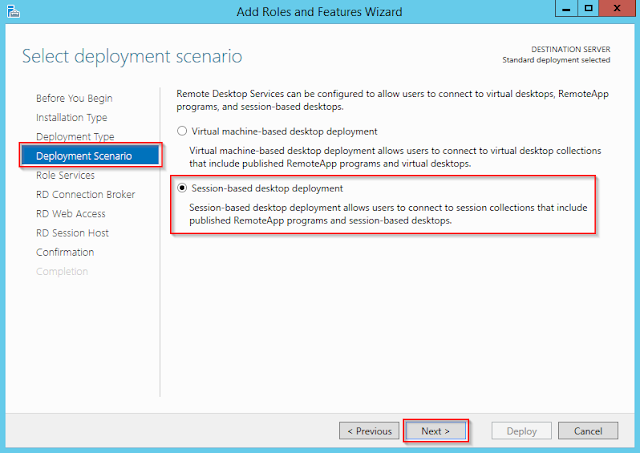
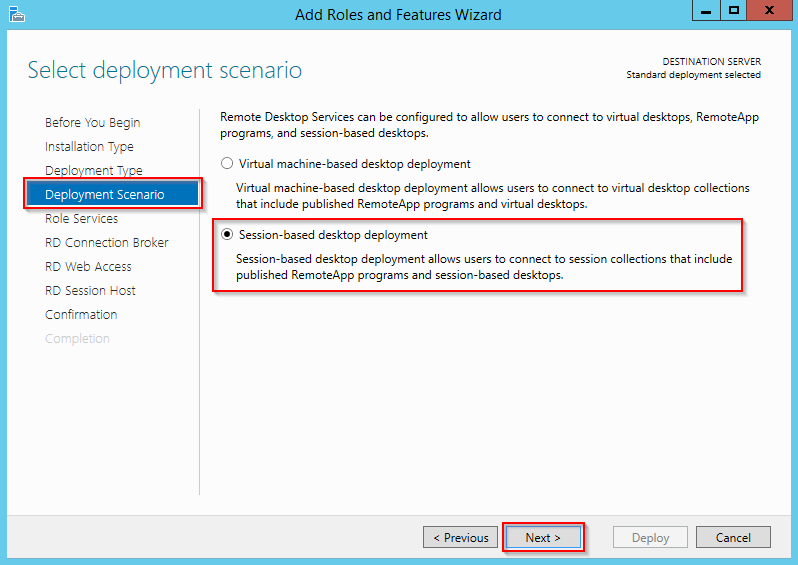
Remote Desktop Services can be deployed as VDI solution or as Session-Based solution. In our lab tutorial we will deploy the Session-Based deployment.
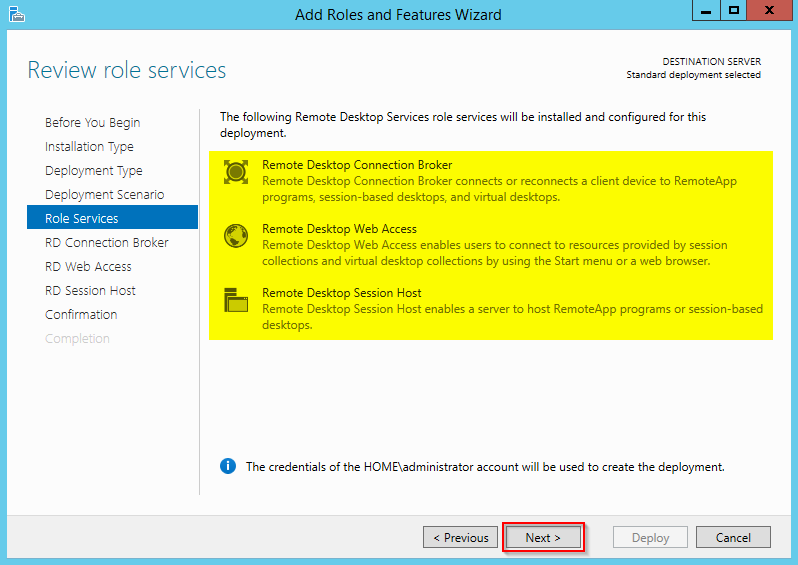
The ‘Role Services’ window will show us which Remote Desktop Services roles will be deployed in our installation, the displayed roles are the minimum roles required for a Remote Desktop Services installation.

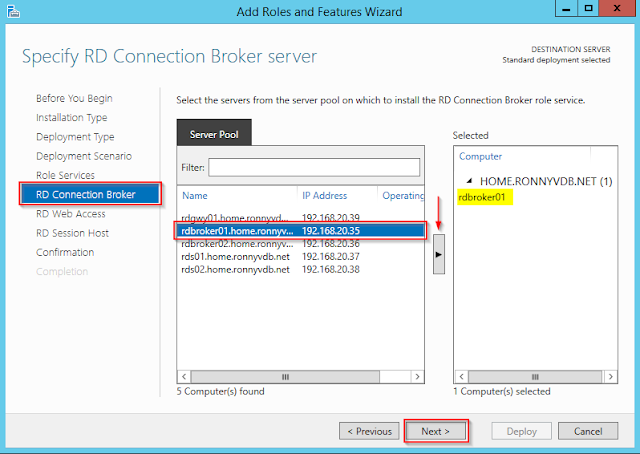
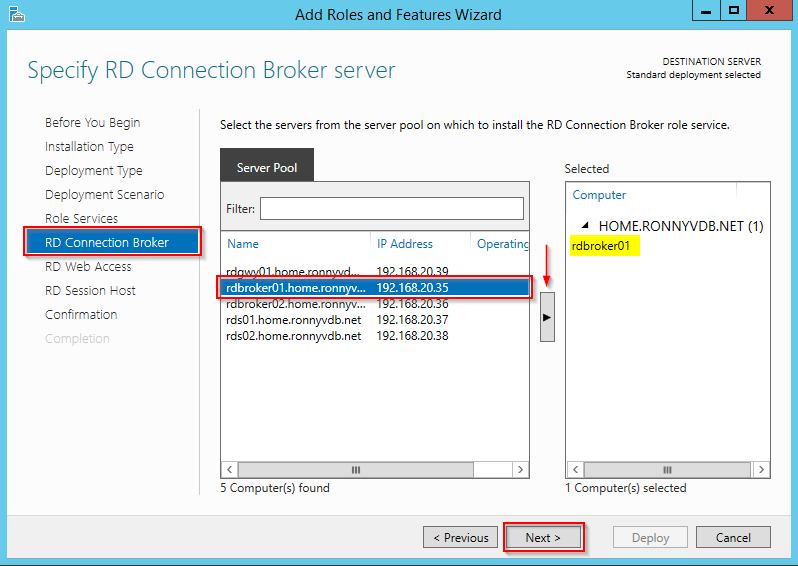
In the next screen we need to assign a server to the first role, the RD Connection Broker Role, that will be deployed in our Remote Desktop Services Farm.
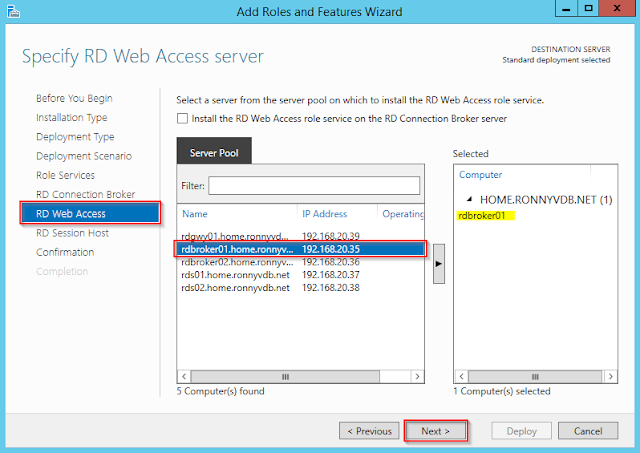
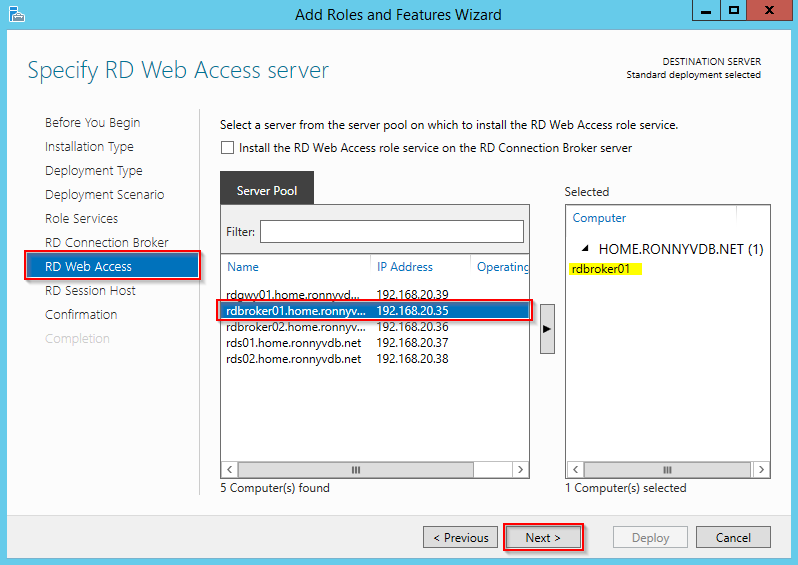
In the next screen we need to assign a server to the RD Web Access role, select a server from the server pool tab and add this to the selected window.
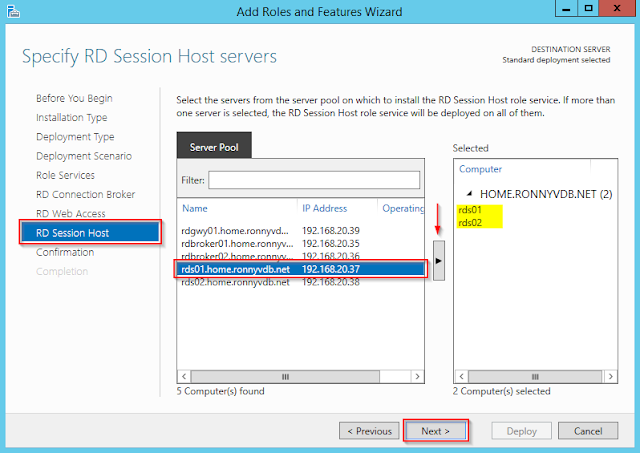
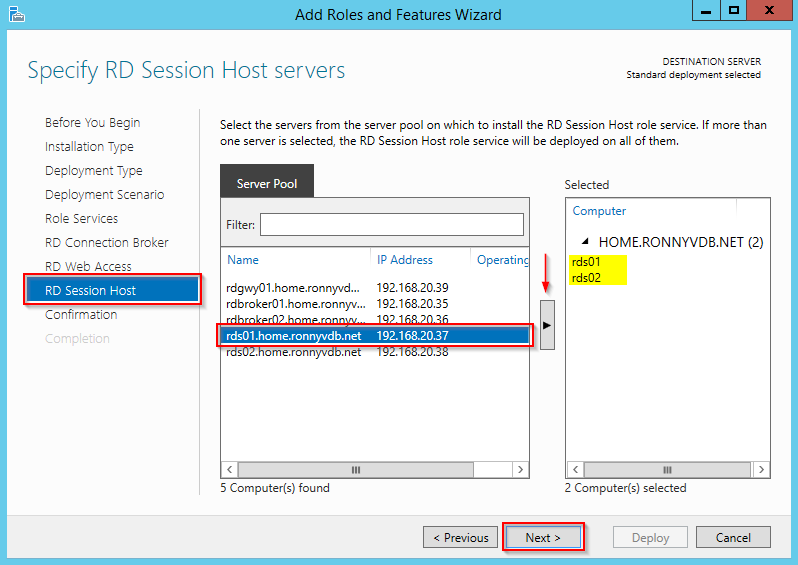
Next we need to assign servers to our third role, the RD Session Host roles, this role wil allmost always have multiple servers assigned to it for high availability purposes.
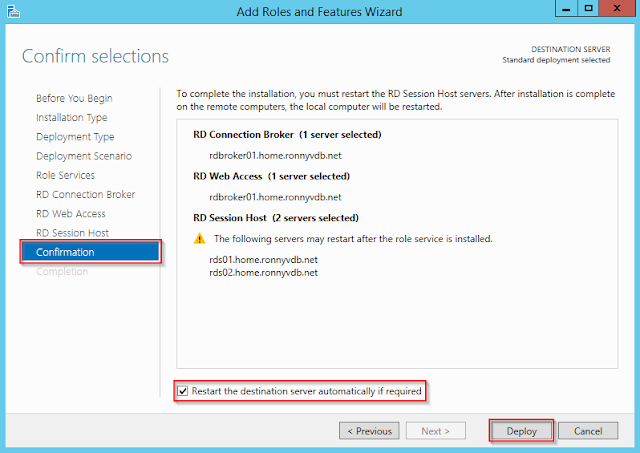
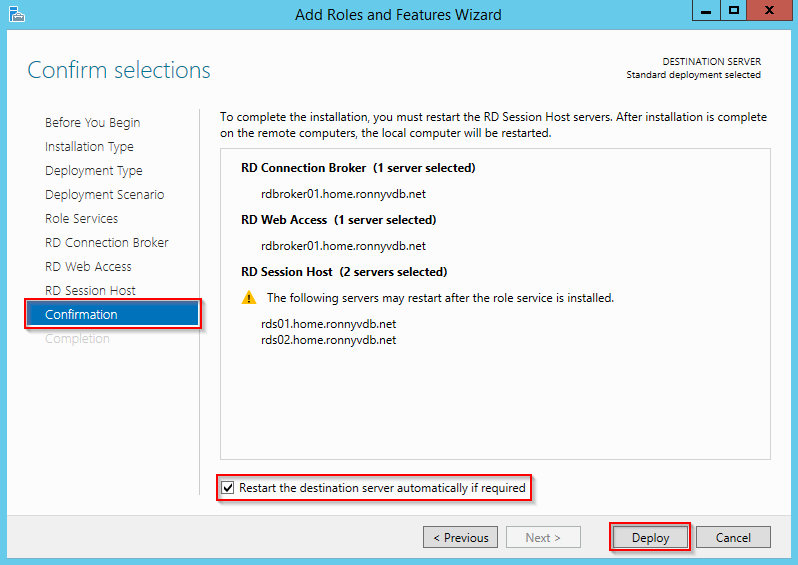
The next screen in our wizard will show an overview of the selections that we made during the wizard, which are now ready for deployment. Click ‘Deploy’ to start the installation process.
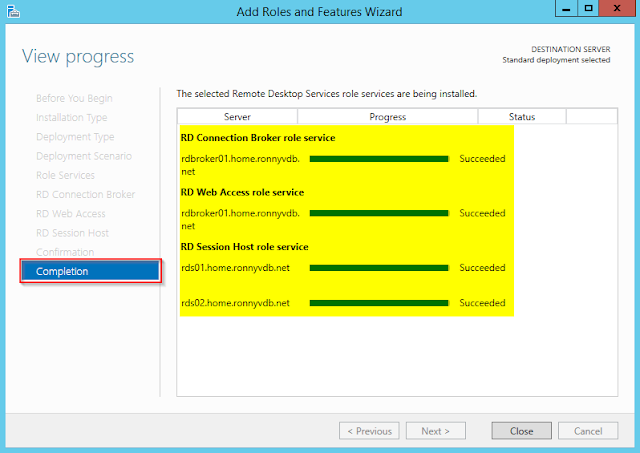
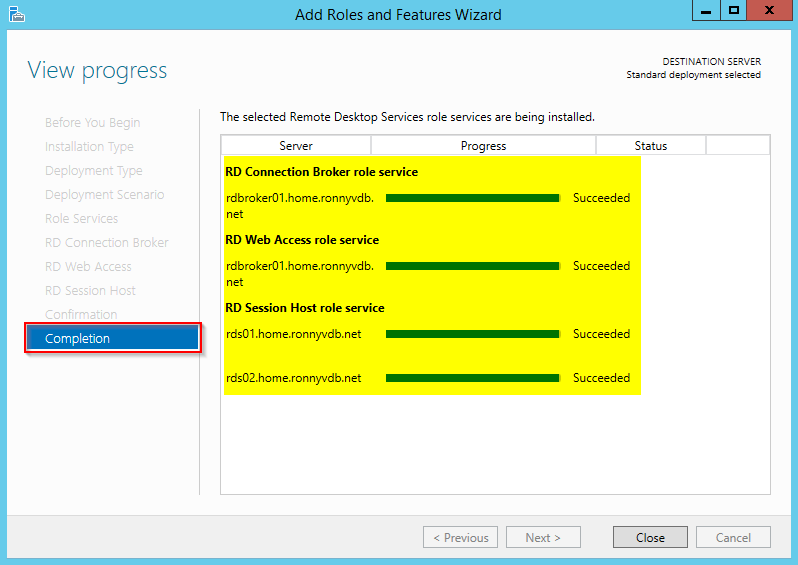
The progress of the Remote Dekstop Services deployment installation can be monitored on the ‘Completion’ screen.
After the installation you will see a new node in the server manager called Remote Desktop Services.
All configuration management for the whole farm and it’s actions, like publishing RemoteApp or Session-Based desktops, or adding more RDS host servers, configure High Availability, will happen from within this centralised management console.
Next we need to ensure that all communication within our Remote Desktop Services farm is secure.
For this purpose, all communication will be encrypted using SSL/TLS protocols.
Before we can use these security protocols, we will need to establish a PKI (Public Key Infrastructure) in our domain environment.
See the next Article: HOWTO – Set up a two tier PKI Hierarchy Deployment.
